Generally speaking, we format a hard drive to promote its performance when we are going to reinstall our Windows 8 system, or there are too many junk files on hard disk or there is a bad way. Now here this article aims at sharing how to format a hard drive on Windows 8 with you by introducing 3 optional means altogether.
Warn:
1. Double click on Computer icon to open My Computer. Locate the partition you want to get it formatted. For example, partition E:

2. Right click on the partition you gonna to format and select Format item.

3. In the following popped-up formatting parameters settings dialogue box, you can personalize the parameters (recommend to check quick format to shorten the time it takes), and then click Start button to start formatting.

4. Click OK button to confirm formatting.

5. Soon, you will be prompted Format Complete. You click OK.

6. Back to partition E: and you will found it is formatted and emptied.

1. Right click on Computer icon and select Manage item.

2. Click Disk Management in the opened Computer Management window.
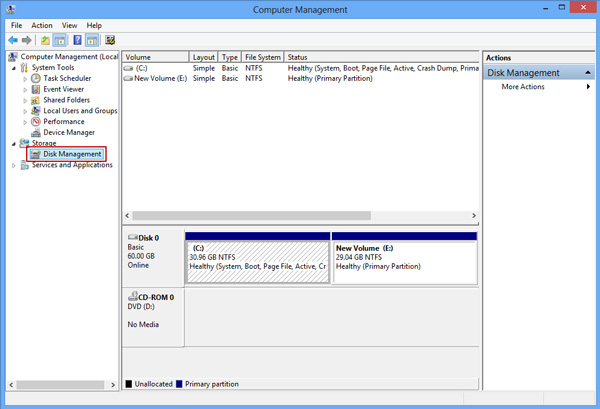
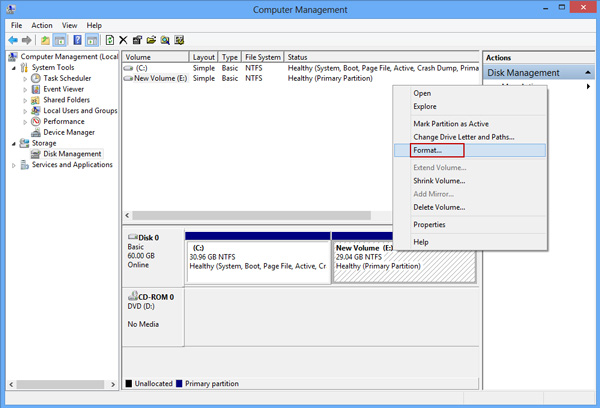
3. Right click on the disk you gonna format and select Format item.
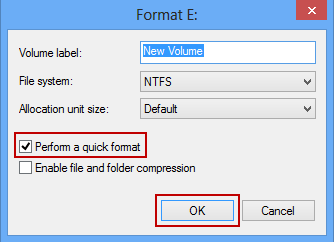
4. Personalize the formatting parameters accordingly to your own requirement or you can keep them all by default. Then click OK button to start formatting.
5. Click OK button to confirm and go on formatting.

6. After the formatting finished, you can go back to My Computer and found the E: has been formatted and emptied.
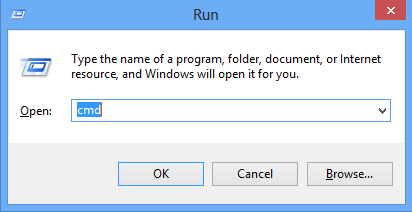
1. Press Windows + R keys simultaneously to open Run box, type “cmd” in it and press Enter key to run it.
2. In Command Prompt window, type in the command: format E: and press Enter key. Replace E: with your target partition to be formatted.
Type in the volume label of the target partition and press Enter.
Type in Y to confirm formatting when you get a WARNING prompt.
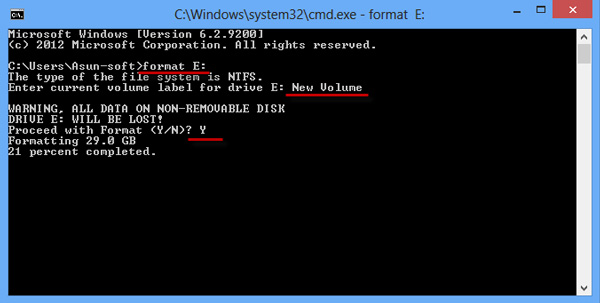
3. It will start formatting and soon after you can see the prompt that Format complete.
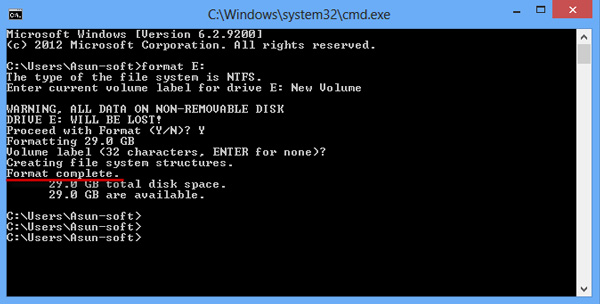
4. You open My Computer, locate partition E: and will found it is formatted and emptied.